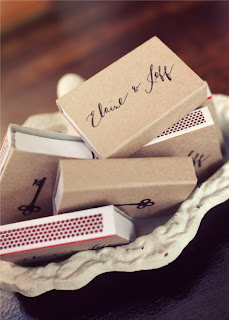
 This is a really great idea on how to make your own personalised match boxes that I saw on Style me pretty, So I had to share it with you, its so easy to make them and you could pretty them up with some really nice paper etc anyway here are the instructions:
 Materials:
matchboxes,
 Step1:Design the front and back images and insert the images into a Word document and create a template. This takes some trial and error to make sure everything is aligned properly. You can use my Word template as a starting point.
Step 2: After the images are printed, use a ruler and razor blade to cut out the strips (leave a little more room width-wise to make sure there’s enough paper to cover the original matchbox cover). I also made a simple window template out of cardstock so I can measure the length of each strip. You may be able to create gridlines in your Word template but this is how we made ours. Step 3: After your personalized matchbox cover is cut out, unfold the original matchbox cover (a hairdryer does help this process).
Step 4: Use a glue stick to apply adhesive to the original matchbox cover. Then, line up your personalized cover with the original cover (making sure to line up the top edge as close as you can). Step 5: As each matchbox slightly varies in width, it’s important to leave a little more room when cutting out the strips. At this stage you can go back and cut out any additional paper visible.
Step 6: Apply glue using a glue stick or tacky glue to the bottom of the strip and glue back together the matchbox cover. (I used bobby pins to enforce the glue and let it sit over night.)
Step 7: After the glue has dried, insert the box of matches back into the cover and ta-da! Your very own personalized matchboxes!!
(I do love those Ta Da moments!!)

No comments:
Post a Comment